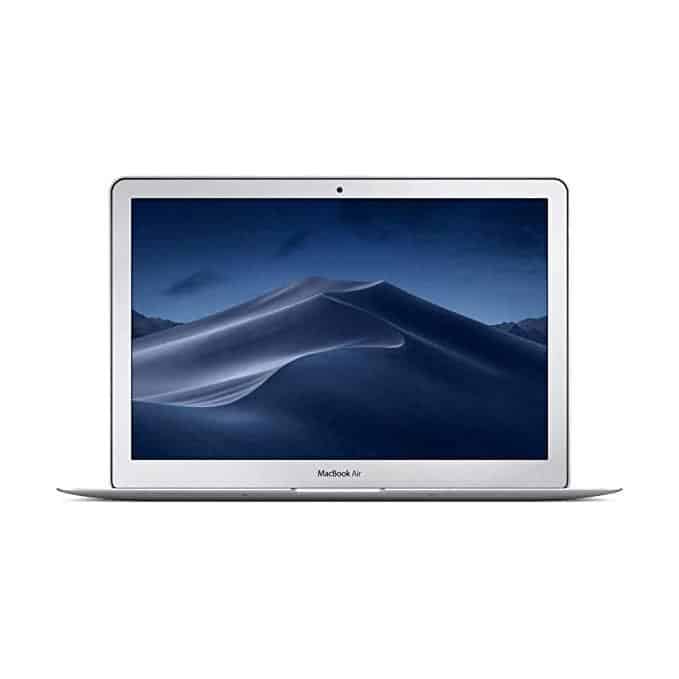
A2337 2020 M1 MacBook Air Screen Repair How To Guide
The A2337 model MacBook Air is Apple’s first Air with an Apple processor instead of an Intel processor. The M1 processor was the main difference between the previous model and the new one, but there were a couple of other things that changed, in particular the LCD panel they used in their A2337 display.
One of the issues these new M1 MacBook Airs do have is a fragile display. The LCD panel is more easily cracked than other models of Macs, and the repair options are more difficult due to the design of the screen. The light design is partly to blame, as well as the thin design of the display assembly itself. I receive reports of the screen cracking on its own from more than any other model Mac.
The cost of repairing these M1 MacBook Air screens varies quite a bit. I have put together an article about the cost of a professional repair that covers some of your options, including self-repair options. I offer both LCD and display repairs if you decide you would like to have me complete the project. After completing literally thousands of repairs I am a pro at getting your Air back up and running quickly.
Options For Repair
When it comes to the A2337 2020 MacBook Air, you have two options for screen repair. You can either replace just the cracked LCD (as long as the display assembly is still in good shape), or you can replace the entire display assembly.
Replacing the entire display assembly is what Apple offers at the Apple Store, as it is a much easier method than replacing the LCD panel only. Replacing the LCD panel only is a difficult procedure that requires quite a bit of skill and a lot of patience. Replacing the LCD panel is difficult enough that I highly recommend practicing on a few broken displays before you complete the repair on your actual computer.
I will cover both methods of MacBook Air screen repair in this article. I will start with the easier and more expensive display assembly replacement, then move on to the more difficult, but cheaper, LCD-only repair. But first, we will go over some reasons you may choose one type of repair over another.
Display Assembly Replacement
On this particular A2337 model, there are a few reasons you might want to replace the entire display assembly rather than just the LCD panel.
Display Damage
Basically, if the display assembly is damaged to a point where it should be replaced, then replacing the entire display assembly is going to be the best way forward. The display assembly includes the LCD panel, back housing, bezel, iSight, hinges, and more.
If there is liquid damage that caused the screen to not work properly, it is very likely that the components inside the display assembly are damaged which is best to repair by replacing the entire display assembly. If there are major dents or a bend to the display housing, then a new LCD panel will likely not fit nicely into the original display assembly.
It is very rare to have to replace the display assembly due to damage. About 95% of the people who contact me looking for a MacBook Air screen repair just require an LCD replacement.
LCD Panel Replacement
LCD panel replacement is by far the most common type of service that is necessary for an A2337 MacBook Air screen repair. Generally, the LCD panel is cracked or broken in some way, and by replacing the LCD panel we are able to fix the computer completely.
There are many ways that the LCD panel in a MacBook Air can fail, but the most common is a cracked display. With these 2020 Macbook Airs, any or bending of the display assembly can cause hairline cracks to form behind the black bezel of the screen. The bending on this model can even come from something as simple as opening and closing the computer from the corner of the display instead of the center. Another common cause of a cracked screen on this model is closing the computer with something between the keyboard and the display. I have seen the screens crack with something as thin as a few sheets of paper in the computer when it is closed.
The main reason to replace just the LCD panel is to save money on the repair. By replacing just the broken part you can save some money that you would have spent purchasing the entire display assembly. The main issue with replacing just the LCD panel is that it is a very difficult procedure. It takes a steady hand, a few practice runs, and a lot of patience to complete one properly. It also helps if you have higher-end equipment like a hot air station.
Most computer repair shops do not offer this repair due to how difficult it is. Because of the level of difficulty associated with the LCD-only replacement, I do not recommend taking on the project yourself unless you have prior experience with display repair on the modern MacBook line.
MacBook Air Display Assembly Replacement Guide
Apple has released its internal repair manual for the A2337 MacBook Air. This manual is a great resource and includes a good section on replacing the display assembly for this A2337 model. If you find something that needs to be covered in more detail, let me know and I will be happy to add anything of note to this page.
https://manuals.info.apple.com/MANUALS/2000/MA2083/en_US/macbookair-M1-2020-07300298A-repair.pdf
Final testing and troubleshooting tips.
Now that the repair is done it is time to test everything out. There are a few things that the display assembly does that you want to be sure to test.
- Turn the computer on and verify the display does indeed work. Verify there are no cracks or issues with the screen itself.
- Close the display and verify that the computer actually goes to sleep when the lid is closed. There are two magnets in this A2337 model display. The magnets tell the computer when the lid is closed.
- Open PhotoBooth or another program to test the camera function. Click to record and video and say a few words, then watch the video back and verify the sound is working. Note if the sound is coming from both speakers as it should be.
- Connect to your wifi and go to an area where the wifi may be a little weak, but where it worked in the past. Verify you are still able to browse the Internet as you did before the repair.
If there are any issues with the tests above, you can refer to my troubleshooting page for the A2337 MacBook Air. I cover common repair issues and how to fix them in depth.
Congratulations on completing the display repair on your MacBook Air! Let me know how it went, and let me know if there is something that would be helpful to have me add to this page.
MacBook Air LCD Only Replacement Guide
First, a word of warning: this repair is considered very difficult even by full-time technicians. Becoming proficient at this particular repair requires a lot of practice. I personally practiced on damaged display assemblies that were bent or liquid damaged until I had mastered the procedure… but it was still very difficult to complete until I had done about 50+ repairs. If you are a beginner, this repair might end up causing more frustration than it is worth.
For those who enjoy a challenge and have some experience with small electric repair, buckle up!
Step 1 – Sourcing the replacement MacBook Air LCD panel.
Finding a new LCD panel to replace your cracked or failed LCD can be difficult. There are sellers on eBay and Amazon that source LCD panels that are grade B or have visual defects, then when you install it into your computer and notice the issue (after hours of work) they say you caused the damage. For this reason, it is best to go with a reputable repair shop to source the part.
In my experience, most reputable repair shops will not sell the part to a customer looking to repair the computer themselves. There are two reasons for this. 1. The rate of breaking the part is quite high on this repair when somebody doesn’t have the needed experience. 2. The rate of returns when people get 10% into the repair and realize it isn’t doable for them is quite high.
I am working on a page dedicated to sourcing the LCD panel for a 2020 A2337 MacBook Air. But most of the vendors I work with have asked me not to include them on the reputable sellers list. At this time I can not make a direct recommendation.
Step 2 – Purchase the tools needed to complete the repair.
The same tools are used to disassemble the A2337 MacBook Air as with the display assembly repair, but for LCD replacement you will also need a couple of additional tools and some special adhesive. The tools needed for the LCD panel replacement are:
- Torx T3 Screwdriver
- Plastic Spudger
- iMac opening kit disks
- Precision tweeters
- A roll of Tesa Tape 61395 5mm
- A roll of Tesa Tape 61395 2mm
- X-Acto knife with #11 blades
- Hot air re-work station
- Double-sided glossy business cards
- Pottery knife
Step 3 – Plan for the repair.
Be sure to set aside a lot of time for this repair. I recommend splitting it into two parts. You start with the display replacement guide above to get the display off the computer, quit for the day, then come back to this guide the following morning to replace the LCD panel on your display. Overall I recommend setting aside an entire day for the LCD replacement portion of the repair. I also highly recommend practicing on a broken display that you don’t care about at all. You can buy broken displays on eBay for around $20 usually.
Step 4 – Complete the guide for removing the display assembly.
For this model, you must remove the display panel from the computer in order to swap out the LCD panel. Use Apple’s display replacement guide to get you through separating the display from the computer, then you move on to the process of removing the LCD panel itself from the display assembly.
Step 5 – Apply heat to the hinge cover of the A2337 MacBook Air
The hinge cover is the black strip that is along the bottom of the screen. The bezel is the part that says “MacBook Air”. Note that the bezel is held in place by a very strong adhesive, so the goal here is to heat up the adhesive to make removing the bezel easier.
Also, note that the bezel is made from a thin piece of some kind of material that acts almost like glass. This means it is easy to crack to break the bezel during the removal. Great care should be taken to not bend the bezel at all. If you do end up with a cracked or broken bezel, you can purchase replacements on eBay or Amazon.
In my experience, a temperature of around 350 degrees with a small air nozzle works really well. Keep the nozzle close to the center of the bezel and work your way around using movements as shown in the video. It is important to not let the heat stay in one area too long.
Step 6 – Remove the bezel.
Prepare yourself for a pretty long process here. What you want to do is keep the area you are working on hot, while working the iMac opening kit disk in between the screen and the bezel. I like to cut off one of the nubs on the disk so there is a flat side of the disk to lay against the LCD panel. Once the disk slides between the LCD and the bezel, you want to make sure it is moved slowly and deliberately along the length of the bezel.
Once the bezel has been separated from the LCD panel, be sure to remove it slowly. Sometimes there is the tape that is still stuck along the length of the bezel that can cause a crack if you are not careful.
Step 7 – Unscrew the screws holding down the LCD panel.
There are two rows of screws along the bottom of the LCD panel. Remove the screws and line them up the way they are on the display so you can put them all back in their correct spots.
Step 8 – Disconnect the backlight and iSight cables.
Now you lift the board as shown in the pictures to disconnect the backlight and camera cables. Take extra care when disconnecting these cables as they are very fragile. I like to carefully tape them down to the back housing for the rest of the repair using painter’s tape. Remember to be very careful as these cables can tear and break easily.
Step 9 – Remove the LCD panel.
This is another part of the repair where you need to relax and take your time. Use the hot air and small nozzle to heat up the right-hand side of the LCD, right where it connects to the edge of the display assembly. There is a 2mm piece of double-sided tape under this area that is holding the LCD down.
I like to angle the hot air towards the edge of the screen and move it along pretty quickly, in order to keep the backlight sheets directly under the LCD from getting damaged.
Once the edge is warmed up, work just the edge of a business card into the gap, and slowly move the business card up to separate the LCD from the housing. I like to prepare a few business cars with the right sized crease before starting the repair.
This part of the repair takes a while, you want to work in sections, so heat up the tape holding down the LCD panel, then move the card a little bit up, then heat up the next area, and move the card up a little more. The better you do this part the easier the rest of the repair will be, so take your time.
Once you have completed the right-hand side, you can move over to the left-hand side of the display. The process for the left is identical to the process for the right.
Once the right and left sides of the LCD panel have been freed, it is time to get the top released from the tape. To complete this stage, you want to lift the bottom of the LCD panel so it flexes against the top, gently pulling away the LCD panel from the display assembly. This part can take 10+ minutes of heating the entire length of the top of the LCD while applying pressure. Don’t rush, take your time.
Finally, the LCD to pull free of the tape, or the tape to pull free of the housing and you can remove the LCD panel from the display completely.
Step 10 – Remove the mount from the original LCD panel.
Now that the LCD panel is removed, you can see the piece of metal along the bottom that the screws were screwed into. This piece of metal needs to be moved back into the display assembly so it is ready for your new LCD panel to be installed.
There is a strip of a board with cables attached to it along the back of this silver piece. The board with all the components needs to be removed in order to be able to remove the metal piece.
Heat up the metal as it is attached with the same tape as the LCD panel was attached with, then use your painting knife to get between the metal and the LCD board. This is usually pretty easy after just completing the more difficult LCD removal process. Once that is one, do the same process but use the pottery knife between the LCD and the metal.
Step 11 – Apply adhesive to replace any removed adhesive.
This is where your rolls of tape come into play! You want to replace any of the black tape that was damaged or removed during the process so far so you can install the new LCD and have adhesive around the whole thing. I recommend going ahead and stripping off all the tape. It will remind you of Venom in the Spider Man movies. Remember to not remove the backing from the top of the tape at this time… you have a few more things you need to complete first.
Step 12 – Install the metal strip on the new LCD panel.
After applying a strip of tape to replace the original tape, you want to screw the metal bracket down into the display assembly and set the new LCD in just for a second. Don’t pull the backing off any of the tape yet! Once you have the LCD lined up nicely, apply some painter’s tape to the top of the display to hold it in place, then lift the bottom of the display enough to pull the backing off the tape on the metal bracket. Lay the LCD panel back into the housing and then unscrew the metal bracket and pull the LCD panel back out with the bracket attached.
Step 13 – Adhere the LCD board to the metal strip.
Next, you need to get the strip from the LCD panel to be adhered to the bottom of the metal strip just like the original LCD was.
Step 14 – Installing the new LCD panel.
First, you want to use your can of compressed air to carefully blow any dust from the backlight sheets before installing the new LCD. Take care to not let those sheets get moved around in the process. They need to sit exactly where they are.
Remove any backing from the adhesive that you installed, and also remove the backing from the LCD panel. You can leave the plastic on the front of the LCD panel, but be sure you remove it from the back before installing.
Then you want to line up the screw holes on the bottom of the LCD panel. Once those are lined up you can slowly sink the LCD into the housing, then gently run your finger around the whole LCD panel along the edge to make sure the adhesive is attached to the LCD panel as well as the back housing.
Step 15 – Connect the backlight and camera connector.
Step 16 – Screw in the 2 rows of screws
Now it is time to screw in those two rows of screws that hold the display and cable cover in place.
Step 17 – Install the bezel.
Remove all the backing from the tape and install the bezel. Gently push on the bezel around the edges to make sure the adhesive is sealed.
Step 18 – Reassembly.
Now go back to the display assembly replacement instructors, and follow them in reverse to put the computer back together.
If there are any issues with the tests above, you can refer to my troubleshooting page for the A2337 MacBook Air. I cover common repair issues and how to fix them in depth.
Congratulations on completing the display repair on your 2020 M1 MacBook Air! Let me know how it went, and if my instructions helped you.
Professional MacBook Air Screen Repair
If you have just read through this guide and decided you would rather have somebody else do the project for you, please consider letting me repair your MacBook Air! I have completed literally thousands of these Mac screen repairs, and have them down to a science. I keep my overhead low and provide a quality service for an affordable price.
I would love to help you get your MacBook Air back up and running properly. If you would like me to repair anything on your computer, you can either go through filling out the order form for a MacBook Air repair, or you can use my quick quote form to get a quote on the project you would like to have done.
Thanks!
-Nathan
2020 M1 MacBook Air Screen Replacement Options
Model A2337
60 Day Warranty
Mail-in Service Available

$299 LCD Panel Replacement
I replace just the cracked LCD.
As long as the edges around the screen aren’t dented and there are no bends to the display, an LCD panel replacement is all that is needed for a cracked screen repair.
I use the same LCD panel Apple uses in their display assemblies: LP133WQ4_SJA1
24 Hour Turnaround

$429 Display Assembly Replacement
I replace the entire display assembly.
The entire display assembly is replaced, this is necessary if there are dents around the edges of the screen, or if the display is bent.
I use a display assembly that is sourced through Apple’s self-service program.
3-5 Day Turnaround
