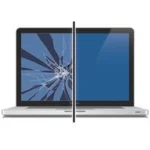
If your MacBook Air isn’t working properly after you’ve repaired it, don’t panic! It is important to slowly and methodically go through what is the cause of the issue in order to reduce the amount of time it takes to narrow down the issue, as well as reduce the amount of stress involved with the repair hiccup.
If you aren’t sure about the steps you completed, check out my repair guide for the A1466 MacBook Air to see pictures of all the steps in the repair process.
Below I will cover common issues that occur with an A1466 MacBook Air after a display-related repair. I cover issues that arise after a display assembly replacement as well as after an LCD-only replacement.
Just scroll down until you spot the issue you are having, then start the troubleshooting steps to narrow down what is the cause of the problem.
Backlight Issues After Screen Repair
This is a fairly common issue because there are multiple parts involved that can cause this particular issue. The first step is to verify it isn’t just a setting. This is easily tested by turning on the computer and holding down the command, option, r, and p keys. Hold these keys down until the computer chimes for the third time, then you can release the keys. This resets the display brightness setting on the computer. If the backlight does not come on, then it wasn’t a settings issue and we can move on to hardware causes.
A common symptom I hear is that only half the screen is bright, and the other half is dark. This is usually caused by a loose or not entirely connected backlight cable (you can skip down to the Checking the backlight cable section to learn more.
Checking the fuse
There is a fuse on the logic board that sometimes causes no backlight after a repair if something is plugged in quite right or if there is a problem with a part.
Checking the fuse with a multimeter method
The best method for checking the fuse is the multimeter method. But if you don’t have a multimeter and you replaced the entire display assembly, skip this and use the “Entire display replacement method” from below. I have included a picture showing where the fuse is on most of the MacBook Air A1466 logic boards. If your board looks different, just send me the serial number of your computer and I will send you a picture showing where the fuse is located on your board.
Entire display replacement method
There are a couple of ways to check if the fuse on the logic board is the culprit. If you have replaced the entire display assembly during your repair, the easiest way is to attach your old display to the computer again to see if it lights up. If the old display lights up, then the fuse and logic board is good and you know the new display assembly is bad. If the old screen does not light up, then it is almost certainly the fuse or another issue with the logic board.
You don’t have to remove the display assembly from your computer and completely install the old one to test, rather you can just open your computer and place it on the edge of a table as pictured. Be sure to disconnect the battery, then unplug the new display’s LVDS cable and plug in just the LVDS connector for the original display, then plug the battery back in. Now you can turn on the computer to test.
Be sure to shut the computer off and disconnect the battery again before removing the LVDS cable.
Replacing a bad fuse
If the fuse is testing as bad, it will need to be replaced. You will also want to check all cables and connections to make sure the same issue won’t happen again. You should only try to replace the fuse if you are very confident in your soldering skills. Otherwise, send your computer into a board repair expert (like me) to complete the project for you.
LCD only repair issue – Checking the backlight cable
If you replaced just the LCD panel on your computer and you have already confirmed the fuse is not the issue, the issue could be with the backlight cable that you connected as part of the repair. It is somewhat common to forget to plug the backlight cable in, not plug it in all the way, tear the cable during the repair, or plug it in upside down. The angle is awkward when you are plugging in the cable, so it is one of the most common issues.
To check the cable you will need to carefully remove the bezel from the computer (hopefully you have not installed it yet). The bezel is very difficult to remove without cracking the LCD, so prepare yourself to be okay with the LCD panel cracking during this process and having to complete the repair again.
Remove any tape holding down the LCD panel board at the bottom, unscrew the two black screws holding the board, and then carefully lift the board up so you can inspect the backlight cable. I have included a few pictures below that show different common issues, as well as a picture showing what it should look like.
Still no backlight
If the fuse has tested good and the backlight cable is inserted correctly, be sure to check the LVDS cable behind the display as well as on the logic board. Inspect it for bent or burned pins or other issues. If everything looks good and you still don’t have a backlight, it may be the LCD panel is defective. The next step would be to test with a known good display assembly to verify if the board or the display is the issue.
Wifi Issues After Screen Repair
If your computer has issues with Wifi after a screen repair, it is almost always because the antenna cable were not plugged in or were not plugged in all the way. Be sure the cables are completely connected to the airport card as shown in the picture below.
Full display replacement
If you have replaced the full display and the cables are fully plugged in but you still have wifi issues, then it is likely that the wifi antenna are broken inside the new display. Returning that display and getting another one will likely fix the issue.
LCD only replacement
If you replaced just the LCD, be sure to inspect the airport antenna where they go through the hinge and verify there are no rips or tears. It is unusual to damage this cable because of the way it is routed, but it is possible.
If your MacBook Air A1466 had wifi issues before and after the display replacement, then it is likely the Wifi Airport Card that is the issue.
No Camera Connected After Screen Repair
The camera is at the top of the display assembly and the cable for it runs along the left side of the display down to the computer itself. This cable being damaged is the most common culprit of no camera connected issues after an LCD-only replacement.
LCD only replacement
When you replace the LCD on these A1466 MacBook Airs, the iSight cable is easy to nick or tear during the process of removing the bezel. Also you can damage the iSight camera board that sits just to the left of the iSight itself at the top of the screen.
Check to make sure the iSight camera cable is plugged into the logic board fully as the picture shows below. Be careful not to plug it in upside down as this can cause damage to the logic board itself.
If the camera is not working after replacing just the LCD panel, I like to purchase the iSight cable and camera as one piece and replace them both at the same time. I always plug them into the logic board before completing the repair to verify they do work. If the new ones also don’t show up, then you know you have a logic board issue.
Display assembly replacement
If you replaced the entire display assembly and the camera is not working, be sure to check that the camera cable is plugged into the logic board all the way. Also, verify it was not plugged in upside down. Plugging the cable in upside down will likely damage the logic board.
<h2 Sleep Issues After Screen Repair
The MacBook Air knows to fall asleep when the display is closed because there is a magnet in the display on the left-hand side towards the bottom that the computer senses when it gets close enough.
Check to make sure that the magnet is there by running something metal like a metal paperclip along the left side of the bezel until it stops because of the magnet. If there doesn’t seem to be a magnet, it might have fallen out during the repair, or the new display assembly might not have had one and should be returned.
Magnet on the wrong side
The MacBook Airs all have the magnet on the left-hand side of the screen (I believe), but there are some computers that came in models that have them on the right-hand side. In fact, the MacBook Pro 2008 and MacBook Pro 2009 look as though they have the exact same display, but one has the magnet on the right, and the other on the left. This means if you swap the displays everything will work except the sleep function.
If you swapped the entire display, you can use the same paperclip method mentioned above to verify the magnet is in the same spot on the old display as it is on the new.
Screen Stops Working As You Open It and Other Issues
These issues are particularly common among a few other Mac models, but these A1466 2010-2017 MacBook Airs generally don’t have these types of issues. But when they do, it is almost always the LCD panel itself that is the culprit.
White screen but nothing else
If you turn on your computer and you get a solid white screen but nothing else, you want to check that your LVDS cable is plugged all the way into your logic board as well as the back of the LCD panel board. If only one side is plugged in all the way there is a chance that only the backlight pins of the LVDS connector are making a full connection. This is unusual but is possible.
The most common cause of a completely white screen is a bad LCD panel.
Flickering connection
If the display seems to flicker with movement, check the LVDS connectors to verify they are plugged in all the way, but it is most likely the LCD panel that is the problem. If the backlight is flickering rather than the image, then check the backlight cable on the back of the LCD board.
Bars Or Lines On Screen
If your new display or LCD panel shows a bar or lines on the screen, the LCD panel is defective.
If it is just the LCD panel that you installed, there is a chance it was damaged during the installation process as they are quite delicate. If you installed an entire display assembly, it is way less likely that you caused the damage and more likely to be just a defective display assembly.
Many vendors will have you swap out the LVDS connector, do a bunch of resets, trying to get the display to work, but if a bar or lines is present, the LCD is the culprit every time in my experience.
Need More Help With Your A1466 MacBook Air
I do have a lot of experience with the 2010-2017 MacBook Airs. During their production, I ran a shop in Los Angeles, Idaho, and Washington and repaired and oversaw repairs on literally thousands of these laptops. I do like the model and miss working on them as much as I used to. They are still a great computer for travel and light use. My turnaround time is quick so I am able to get your computer back to you ASAP.
If you would like me to take a look at your computer, I do offer a free diagnosis service where I diagnose the issue and let you know the cost for repair. If you have a question about a particular symptom and would like some direction, feel free to fill out my question form and I will get back to you as quickly as I can.
If you found this information helpful enough that you want to buy me a coffee, I would appreciate that! I am glad to be of help. Thanks for reading!
-Nathan